ASTM B111 C44300 Admiralty Metals Seamless Tubes
ASTM B111 C44300 Admiralty Metals Seamless Tubes
Standard
ASTM B111 Standard Specification for Copper and Copper-Alloy Seamless Condenser Tubes and Ferrule Stock.
ASTM B111 C44300 Admiralty Metals Seamless Tubes up to 3 1 ⁄ 8 in. [80 mm] inclusive, in diameter, for use in surface condensers, evaporators, and heat exchangers.
ASTM B111 C44300 Admiralty Metals Seamless Tubes Quick Details
Manufacture:Seamless process ,Cold-drawn
Wall thickness(WT): 0.5 mm-12.7 mm.
Outer diameter (OD): 5 mm-80 mm
Length: 6M or specified length as required.
Ends: Plain End, Beveled End, Treaded
Additional Info
Port of Shipment: Any Port, China
Payment Terms: T / T, LC
Delivery: 25 days after payment
Surface: Tubes will be varnished to prevent rust.
Marking: Standard + Steel Grade + Size + Heat No + Lot No
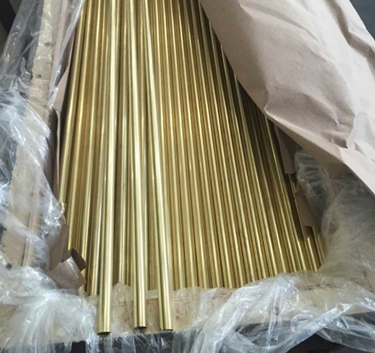
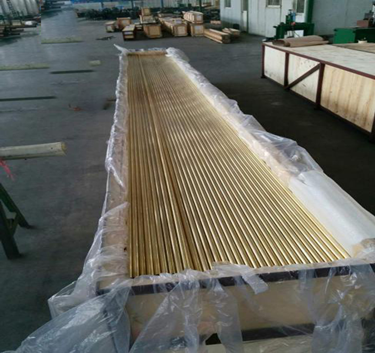
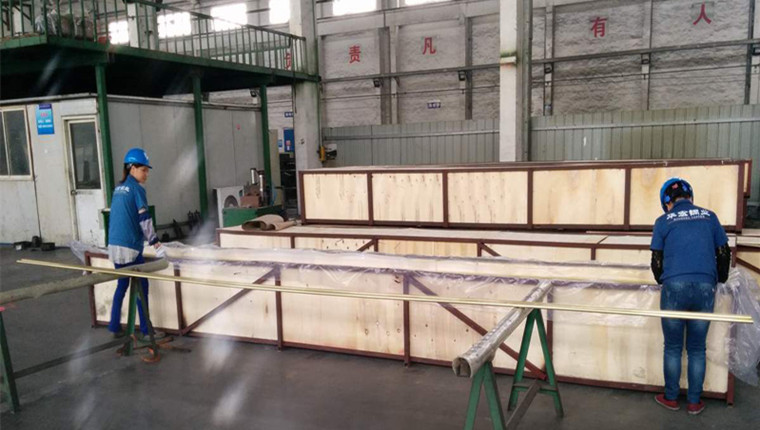
Package: Bundles (hexagonal),Wooden Boxes,Crates (steel/wooden) or as required
Materials and Manufacture
Materials:
material of manufacture will be a form of such purity and soundness as to be suitable for processing into the products ASTM B111 Standard.
When specified in the contract or purchase order that heat identification or traceability is required, the purchaser shall specify the details desired.
Manufacture:
C44300 Admiralty Metals Seamless Tubes will be manufactured by such hot-working, cold-working, annealing, straightening, trimming,and other processes as to produce a uniform seamless tube in the finished product.
C44300 Admiralty Metals Seamless Tubes will be hot- or cold-worked to the finished size, and subsequently annealed, when required, to meet the temper properties specified.
Equivalent Grade of C44300
| Material Designation | Corresponding Material Symbol | ||||
| GB/T8890 | ASTM B111 | BS2871 | JIS H3300 | DIN1785 | |
| Admiralty Brass | HSn70-1 | C44300 | CZ111 | C4430 | CuZn28Sn1 |
Chemical Composition
| Designation | Chemical Composition % | ||||||||
| Cu | Sn | Al | As | Ni | Fe | Mn | Pb max. | Zn | |
| C44300 | 70.0-73.0 | 0.9-1.2 | – | 0.02-0.06 | – | 0.06 max | – | 0.07 | Rem |
Temper
Tubes shall be furnished in the temper designations identified in Tables 2
Annealed temper O61.
Mechanical Properties
| Copper or Copper Alloy UNS NO. | Temper Designation | Tensile Strength | Yield Strength |
Elongation in 2 in., |
|
| Code | Former | min ksi(min MPa) | min ksi(min MPa) | min % | |
| C44300 | O61 | annealed | 45(310) | 15(105) | --- |
Grain Size for Annealed Tempers
Grain size will be the standard requirement for all product in the annealed (O61) temper.
C44300 Admiralty Metals Seamless Tubes will depend only on average grain size of the test specimen within the limits of 0.010 to 0.045 mm taken from each of two sample portions,and each specimen shall be within the limits prescribed herein when determined in accordance with Test Methods E112.
Performance Requirements
Expansion Test:
Tube specimens selected for test shall withstand the expansion shown in Table 3 when expanded in accordance with Test Method B153. The expanded tube shall show no cracking or rupture visible to the unaided eye.
Hard-drawn tubes not end annealed are not subject to this test. When tubes are specified end annealed, this test is required and shall be performed on the annealed ends of the sampled tubes.
Tubes for ferrule stock are not subject to the expansion test.
| Temper Designation | Copper or Copper Alloy UNS No. | Expansion of Tube Outside Diameter, in Percent of Original Outside Diameter | |
| Code | Name | ||
| O61 | annealed | C44300 | 20 |
Flattening Test
Test Method—Each test specimen shall be inspected per Test Method B968/B968M.
During inspection, the flattened areas of the test-specimen shall be free ofdefects, but blemishes ofa nature that do not interfere with the intended application are acceptable.
Tubes for ferrule stock are not subject to flattening test.
Residual Stress Test
A residual stress test, when specified in the purchase order, is required only for Copper Alloy UNS Nos. C44300 and when not supplied in an annealed temper.
Nondestructive Testing
Each tube shall be subjected to the eddy-current test in Eddy-Current Test.
Tubes may be tested in the final drawn, annealed, or heat-treated temper or in the drawn temper before the final anneal or heat treatment unless otherwise agreed upon by the supplier and the purchaser. The purchaser may specify either of the tests in Hydrostatic Test or Pneumatic Test as an alternative to the eddy-current test.
Eddy-Current Test—Each tube shall be passed through an eddy-current testing unit adjusted to provide information on the suitability of the tube for the intended application. Testing shall follow the procedures of Practice E243.
.
Hydrostatic Test—Each tube shall stand, without showing evidence of leakage, an internal hydrostatic pressure sufficient to subject the material to a fiber stress of 7000 psi [48 MPa] as determined by the following equation for thin hollow cylinders under tension. The tube need not be tested at a hydrostatic pressure of over 1000 psi [7.0 MPa] unless so specified.

P = hydrostatic pressure, psig [MPa];
t = thickness of tube wall, in. [mm];
D = outside diameter of the tube, in. [mm]; and
S = allowable stress of the material, psi [MPa].
Pneumatic Test—Each tube shall be subjected to an internal air pressure of 60 psig [400 kPa], min, for 5 s without showing evidence of leakage. The test method used shall permit easy visual detection of any leakage, such as by having the tube under water or by the pressure differential method.Any evidence of leakage shall be cause for rejection.
Dimensions and Permissible Variations
Dimensions and Permissible Variations
|
Outside Diameter, mm |
Wall Thickness, mm | ||||
| 0.508 | 0.813 | 0.889 | 1.07 | 1.24 and Over | |
| 0.559 | |||||
| 0.635 | |||||
| 0.711 | |||||
| Diameter Tolerance, Plus and Minus, mm | |||||
| Up to 12, incl | 0.076 | 0.064 | 0.064 | 0.064 | 0.064 |
| Over 12–18, incl | 0.10 | 0.10 | 0.10 | 0.089 | 0.076 |
| Over 18–25, incl | 0.15 | 0.15 | 0.13 | 0.11 | 0.10 |
| Over 25–35, incl | --- | --- | --- | 0.20 | 0.13 |
| Over 35–50, incl | --- | --- | --- | --- | 0.15 |
| Over 50–79, incl | --- | --- | --- | --- | 0.17 |
Wall Thickness Tolerances, Plus and Minus
| Wall Thickness,mm | Outside Diameter, mm | ||
| Over 12 to 25,incl | Over 25 to 50,incl | Over 50 to 80,incl | |
| 0.50, incl to 0.80 | 0.08 | --- | --- |
| 0.80, incl to 0. 90 | 0.08 | 0.10 | --- |
| 0.90, incl to 1.5 | 0.11 | 0.11 | 0.13 |
| 1.5, incl to 2.1 | 0.13 | 0.13 | 0.14 |
| 2.1, incl to 3.0 | 0.17 | 0.17 | 0.17 |
| 3.0, incl to 3.4 | 0.18 | 0.19 | 0.20 |
Length Tolerances
| Specified Length, mm | Tolerance, all Plus, mm |
| Up to 4500 | 2.4 |
| Over 4500–6000, incl | 3.2 |
| Over 6000–10 000, incl | 4.0 |
| Over 10 000–18 000, incl | 9.5 |
| Over 18 000–30 000, incl | 13.0 |
Workmanship, Finish, and Appearance
Roundness, straightness, uniformity of the wall thickness, and inner and outer surface of the tube shall be such as to make it suitable for the intended application. Unless otherwise specified on the purchase order, the cut ends of the tubes shall be deburred by use ofa rotating wire wheel or other suitable tool.
Annealed-temper or thermally stress-relieved tubes shall be clean and smooth but may have a superficial, dull iridescent film on both the inside and the outside surface.Drawn-temper tubes shall be clean and smooth, but may have a superficial film of drawing lubricant on the surfaces.
Note:
All tubes shall be supplied as per applicable ASTM B111 /B 111M Specification
Mill test certificates will be issued
We can provide 3.2 Certification according to the needs of you
Photo of ASTM B111 C44300 Admiralty Metals Seamless Tubes


![field:title/]](/uploads/221031/1-221031144U1451.jpg)
![field:title/]](/uploads/221031/1-22103114362c40.jpg)
![field:title/]](/uploads/221031/1-221031134524O5.jpg)
![field:title/]](/uploads/221031/1-22103113301HW.jpg)
![field:title/]](/uploads/221028/1-22102Q93G1C2.png)